November 23rd, 1994
Currently listening to: Games Without Frontiers - Peter Gabriel
Apologies for the lack of updates in October. Work got in the way, and I had no time to work on anything for the shelter :( Luckily, this month has been slower paced, so I’ve had time to make up for it!
Since the overall set-up of the living area is complete, I’ve turned my efforts entirely towards a section I was dreading: the “bathroom”. It isn’t much of a room (or a bath), and I can see that plumbing could easily be the first and foremost thing I’d miss if I had to spend time in the shelter. However, it’s obviously important to set up a method for disposing of human waste and for washing oneself. There were plenty of good tips in NWSS and elsewhere.
The most important element was the placement of the waste. I suspect this was even taken into consideration when the shelter was first constructed, since the exhaust airway is placed in the sort of “nook” created by the wall bisecting the south end of the shelter. I got two 12-gallon buckets that are airtight, and plenty of thick garbage bags. I didn’t feel particularly inclined to calculate how much waste I would produce in 6 months, but fortunately I don’t believe that it will be necessary. After the initial deposition of fallout, it will of course be dangerous to venture outside of the shelter, but the dose rate of stagnant fallout is usually lethal with an hour of exposure. This means that brief, occasional ventures just outside of the shelter are generally safe. Therefore, regularly emptying the waste buckets is perfectly feasible.

However, in order to enact this plan of waste management, I need some way to exit the shelter in the first place. I still haven’t gotten the emergency exit to open (albeit I haven’t tried very determinedly yet). I tried brute force first, and while the handle would turn with enough pressure, I couldn’t manage to pull it open. I realized while tugging desperately that if I did manage to open it, there’s a good chance I’d flood the shelter with dirt. I assumed that since I saw no sign of a hatch or entryway outside, whatever passage had existed was likely filled in since construction.
Using the measurements I’d gotten from the shelter, as well as the stairs leading to it, I could get a fairly good estimate of where I should start digging. It turns out that the emergency exit door lines up pretty well with one of the outer walls above ground. I started digging around that area. Pretty quickly, my shovel was met with resistance, loudly bouncing off something solid a foot or so under the dirt. Digging around that, I found a flat concrete surface. Upon further inspection, it seemed as though there were stairs built right up against the foundation of the house, leading down and connecting to what was definitely the outer wall of the shelter.
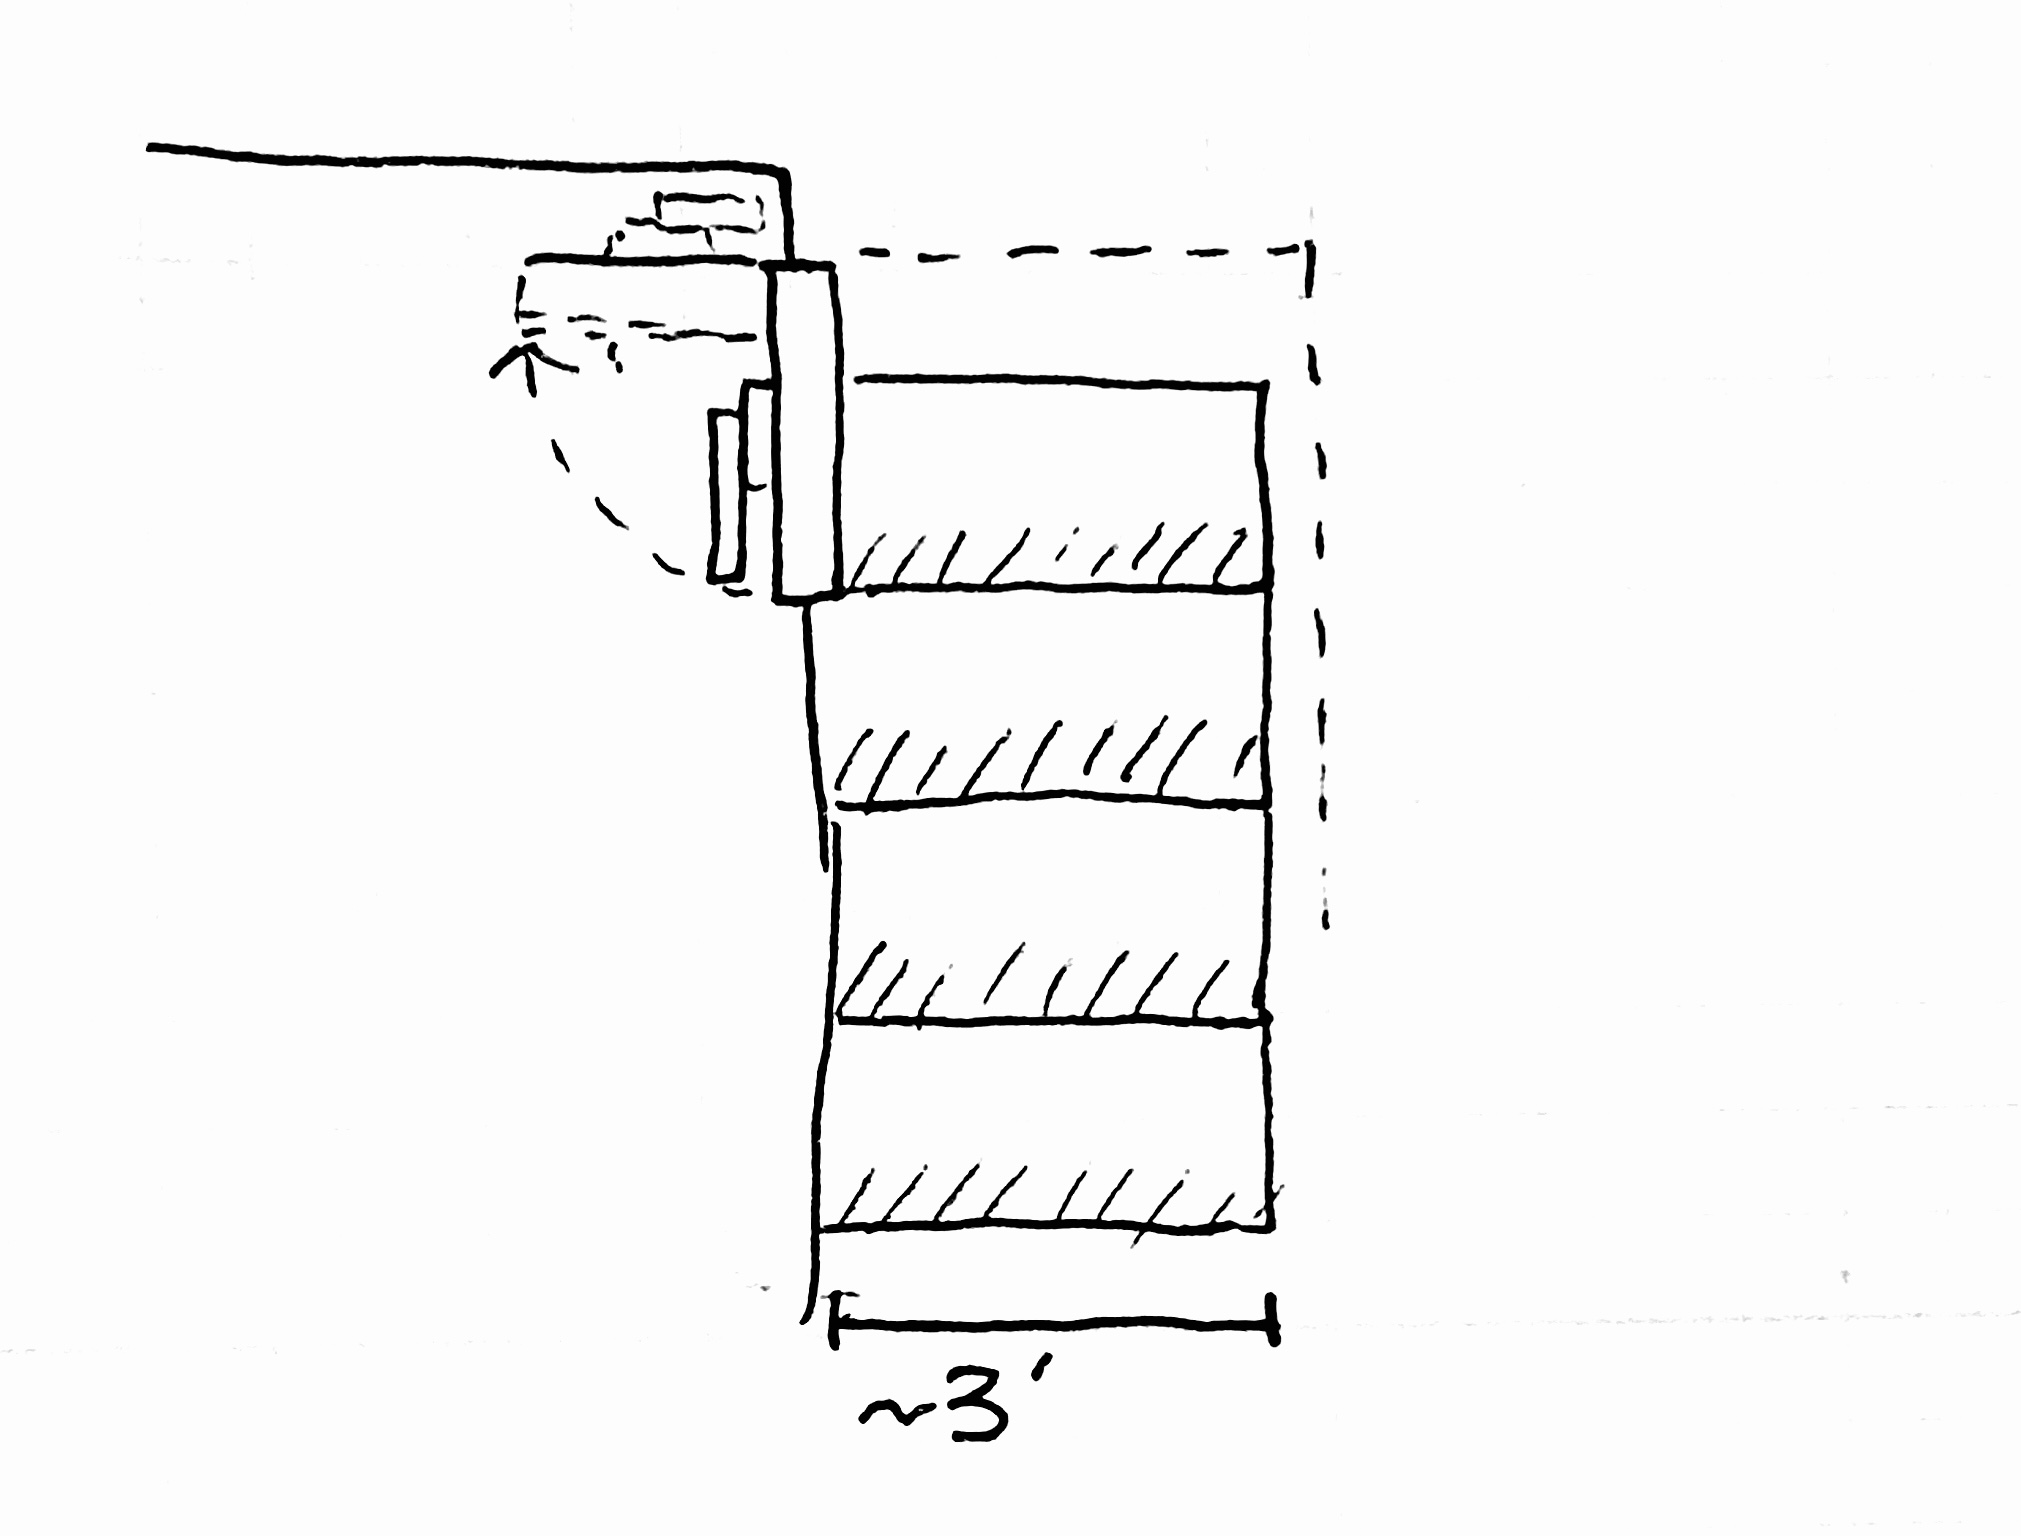
It took a while to fully clear out the staircase (the ground is starting to freeze up as winter approaches, and I was suddenly more frustrated that I couldn't have worked on this in October). But sure enough, I was finally greeted with the other side of the door. I went back through the house and down to make sure that the handle was turned so that the door was likely unlatched, and then I went back to try to get it open. After a few solid kicks, the door finally gave way! Hooray!
I decided to dig a hole right near the staircase to put waste into, so I wasn’t just tossing it onto the ground whenever I came to dispose of it. The next thing to do was to install the gravity shower and water collecting basin, as well as the curtain across the doorway that I’d planned on putting in. The shower is pretty simple, just a normal shower head rigged up to tubing that lets you pump water from a bucket with your foot. Nothing fancy.
As usual, I stocked more food, and got plenty of cleaning supplies to put into the new bathroom area. The next steps are obtaining and setting up a radiation detector, stocking more supplies such as tools, utensils, clothing, etc., and getting a good, sturdy radio. See you next time!